Critical Note: Before burning a DVD, read the information in the Album Output Preparation topic and choose Guides > TV Safe Area from the menu to see which parts of your album may not be visible when viewing the DVD on a TV.
Also check to ensure that your album will fit on a DVD. See the Check Album topic.
Additionally, if you experience problems burning the DVD, try a different brand of blank media (i.e. Verbatim). If you continue to experience problems with creating a DVD-Video, email Technical Support at [email protected].
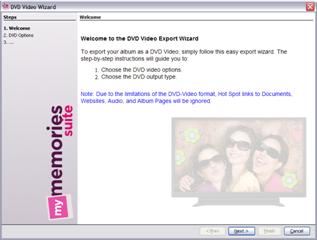
After choosing the Burn DVD-Video option, the DVD Video Wizard window will appear.
Click Next to continue.

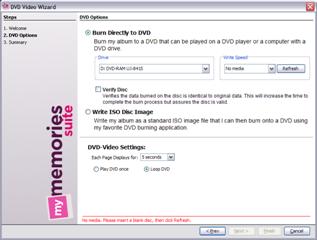
My Memories Suite will load the DVD Options page.

Choose a method for creating your DVD-Video and then click Next.
• To burn the DVD-Video immediately, click on Burn Directly to DVD (a DVD burner and a recordable DVD are required). Ensure that you have a DVD burner, blank DVDs, and sufficient free space on your hard drive before choosing this option. See the instructions below.
• Click on the Write ISO Disc Image option to create an ISO disc image. You can use this option if the current computer is not able to burn a disc and you have a way of moving the ISO file to a computer with burning capabilities (using a USB flash drive, for example). You may also want to select this option if you would like to create multiple copies of your DVD-Video, or you have a software program that can burn discs from ISO disc images (e.g. Sonic RecordNow). Ensure that you have sufficient free space on your hard drive. See the instructions below.
• Under DVD-Video Settings, click on the drop-down menu to choose the number of seconds each page will display. Also, choose a DVD looping option. If Loop DVD is selected, the DVD will start playing from the start after it finishes. Choosing Play DVD Once will end the presentation after the DVD has played once through.
1. Ensure that you have a CD/DVD burner, a blank disc, and sufficient free space on your hard drive.
2. Choose the burning options:
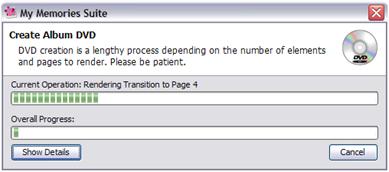
3. My Memories Suite will prepare the album for writing to DVD. The preparation and burning process can be quite lengthy, depending on the number of pages and video clips in the album. Please be patient.

4. My Memories Suite will now burn your DVD-Video.
5. When finished, My Memories Suite should indicate that your album was successfully burned to a DVD-Video.
6. You are now ready to play the DVD-Video on a Windows or Mac computer with a DVD drive, or on a standard DVD player.
1. Ensure that you have enough free hard disk space, and click Next.
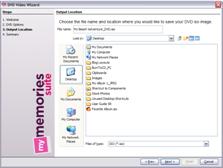
2. The Output Location window will load. Choose a folder in which you would like to create the ISO file. Double-click on folders to open them. Click on the Next button to choose the current folder.

3. The Summary page will load. Review your selections and click Finish to continue.
4. My Memories Suite will begin preparing the album for writing to an ISO file. The ISO creation process can be quite lengthy, depending on the number of pages and video clips in the album. Please be patient.

5. My Memories Suite will notify you when the disc image has been created successfully.

If you have problems creating a DVD-Video, send an email to technical support at [email protected].